Welcome to your Moe’s Southwest Grill MSI Training Portal!
Sign in to MSI
OR
For assistance obtaining login credentials, please submit a ticket through Catering Support.
Optimize Your Settings
For all account related questions, or to submit a request to adjust any of the following settings, please submit a ticket through Catering Support.
For new owners, or changes of ownership, please complete the MSI/ezCater New Store Form here.
Default parameters for MSI include:
- Store Hours: 9am-10pm
- Closures: Christmas & Thanksgiving
- Lead Time: 18 hours (24 hours with set CSR hours)
- Delivery Fee: $15
- Delivery Radius: 20 mi
- Order Minimum: $30 for pickup orders, $150 for delivery orders
Parameters that can be updated:
- Store Hours
- Closures
- Delivery Fee
- Delivery Radius
- Order Minimum
- Lead Times (Delivery and Pickup)
Daily Store Operations
Reviewing Orders
Use a variety of filters and headings to limit and sort your upcoming catering orders.
- Use calendar menus to limit orders by Date Ordered/Required
- Use checkboxes to limit orders by type or action required
- Limit results to specific regions/stores
- Set page to automatically refresh every 5, 10 or 15 minutes
- Remember your selections for quick reference
- Sort results by column headings
- Use links to enter orders, clients, and store details
- Enter orders to confirm/accept them, and print pack slips
- Hover for more detail on when orders have been entered, confirmed or edited
How to use the use the view orders page to focus on your most pressing catering orders.
Producing a Compact Production Item Report
- Navigate to Operational Reports > Production by Production Item (Compact)
- Use the filtering options to limit the report by the current date, order status, service channel, etc., and group by order as needed
- Click View Report to produce a report of the production items required for your day
- Print the report for a physical document to aid in preparing to assemble your orders
Produce a list of the ingredients required to assemble all of your orders for the day.
Producing a Pack Slip
- Navigate to Orders > View Orders and use the filters to locate an Order
- Click an Order Id to enter the Order
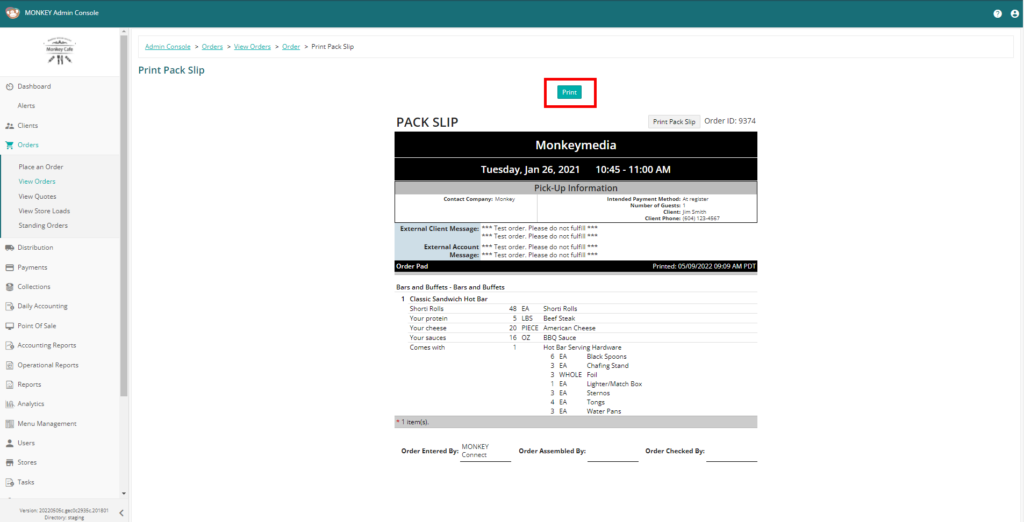
- Click the Print Pack Slip icon to review the Order’s Pack Slip
- Click Print to print a physical Pack Slip document
Produce a breakdown of an orders contents to help assemble it.

Delivery Drivers
Assigning a Store Driver
To assign deliveries, you must first add store drivers in the system. Navigate to Distribution > Drivers to add store drivers.
- Navigate to Distribution > Deliveries
- Filter for the date you want to assign deliveries to
- If you have multiple store drivers, toggle/select the driver you want to assign to each delivery
- Click Assign Driver to assign them
- Use the respective buttons to print driver sheets, pack slips, and invoices for selected drivers
Use the store console to assign drivers to your delivery orders.
Using DoorDash Drivers
Assign the DoorDash delivery service to your store drivers to request a DoorDash driver when assigning them to a delivery.
- Navigate to Distribution > Deliveries
- Filter for the date you want to assign deliveries to
- Toggle/select the DoorDash Driver to each delivery you want to send a request for
- Click Assign Driver to assign them and a request will be sent to DoorDash
Use the store console to request DoorDash drivers for your delivery orders.
To successfully request a DoorDash driver, you must confirm/accept and assign the DoorDash driver at least 3 hours prior to the fulfillment time.
Using ezDispatch Drivers
Use the Request ezDispatch button to request an ezDispatch driver to handle orders from the ezCater Marketplace, or ezOrdering services.
- Navigate to Distribution > Deliveries
- Filter for the date you want to assign deliveries to
- Click ‘Request ezDispatch’ to send a request to the ezDispatch service for applicable orders
- Return to the order readback screen to view the status and assignment of your ezDispatch request
- Alternatively, ezDispatch can be requested for eligible orders by clicking ‘Request ezDispatch’ directly from the order readback screen
Only orders that arrive from the ezCater Marketplace or ezOrdering services are eligible for ezDispatch.
Once assigned, ezDispatch orders can not be updated or cancelled from the app. For assistance with an ezDispatch order, contact 1-800-488-1803.
Throughout the Day
Update orders to reflect any changes as they are fulfilled and plan for upcoming orders in advance.
- Use the order pad to update orders to reflect any last minute changes
- IF GRATUITIES ENABLED: From the order readback screen, add any applicable gratuities
- IF POS ENABLED: Post to POS after orders have been confirm/updated with last minute changes/gratuities
If you encounter issues while posting your catering orders to the POS, contact poshelp@moes.com.
End of Day
Before you leave for the day, take a few steps to prepare for tomorrow.
- Use the view orders page to review upcoming orders for the next 3-5 days
- Assign drivers for the next 3-5 days’ orders
Adding Clients/Billing Accounts
Adding Clients
All orders must be placed under a client account. Search for the client in the system. If no account exists, use the following steps to add them.
- Navigate to Clients > Clients and Billing Accounts
- Search for an existing account using their name/email
- If no account exists, click Add Client
- Complete the form with as much detail as possible
- Click Go to save the profile
Use the search tools to locate any existing account for the client and add them to the system if they have not ordered catering before.
Adding Billing Accounts
Billing accounts allow customers to order, track, and defer payment on behalf of a company or organization.
- Navigate to Clients > Clients and Billing Accounts and search for/enter the Client account you want to add a billing account to
- Click the ellipsis and select Search and Add Billing Account to search for and add the Billing Account to the Client, if it exists
- If no account exists, return to the Client account, click the ellipsis and select Add Billing Account
- Complete the form with as much detail as possible, and define the payment terms if allowing the company to defer payment with a house account
- Click Go to save the profile
Billing accounts open up options for deferring payments or allowing your accounting team to use credits.
If enabling a House Account, payment for Orders placed under the Billing Account can be deferred based on the configured terms.
Managing Orders
Starting an Order
Complete the order info. If adding a new client, you can begin at the client profile once they’ve been added.
- Navigate to Clients > Clients and Billing Accounts
- Search for an existing account using their name/email
- Click the client name to enter and review their profile
- Click Place Order
- Enter the order info as needed (include Province and Postal Code for pickup orders)
- Use the Store Finder to select the closest matching store (confirm store with customer for pickup orders), or the Region/Store drop downs if the client requests a specific location that does not appear in the closest matching list.
- Click Go to Next Step to save and continue to the order pad
Review the client profile before placing an order to review any special considerations or previous issues.
Using the Order Pad
Items and options are limited to what is available in the order pad. Price/availability may vary by store.
- After completing the order info, enter the order pad
- Use the navigation bar to locate and select items
- Enter the required quantity and Add to Order
- Make any necessary adjustments/selections, per the customer
- When finished, click Order Details to continue to the readback screen
Complete the order info to begin this step.
Completing Orders
Return to the order info, order pad, or billing info to correct any errors found on this page.
- Confirm the customer details and delivery address as needed
- Confirm the correct items and quantity are on the order
- If using a credit card that has been previously saved to the profile, click to confirm/preauthorize the order, otherwise:
- Click Preauthorize Credit Card and enter the credit card information for authorization, or
- Click Request Credit Card
- Confirm the recipient address and click Send to deliver the request. Once completed, the order will be confirmed by the system
- A confirmation email is send to the customer/billing account once the order is confirmed
Review the order details and menu items, and enter or send a request for credit card details from the client.
Duplicating Orders
Return to a previous order and copy it using the same options.
- Navigate to Clients > Clients and Billing Accounts to search for and enter a Client profile
- Click Orders to view the client’s order history
- Click an Order ID to enter the Order Readback screen
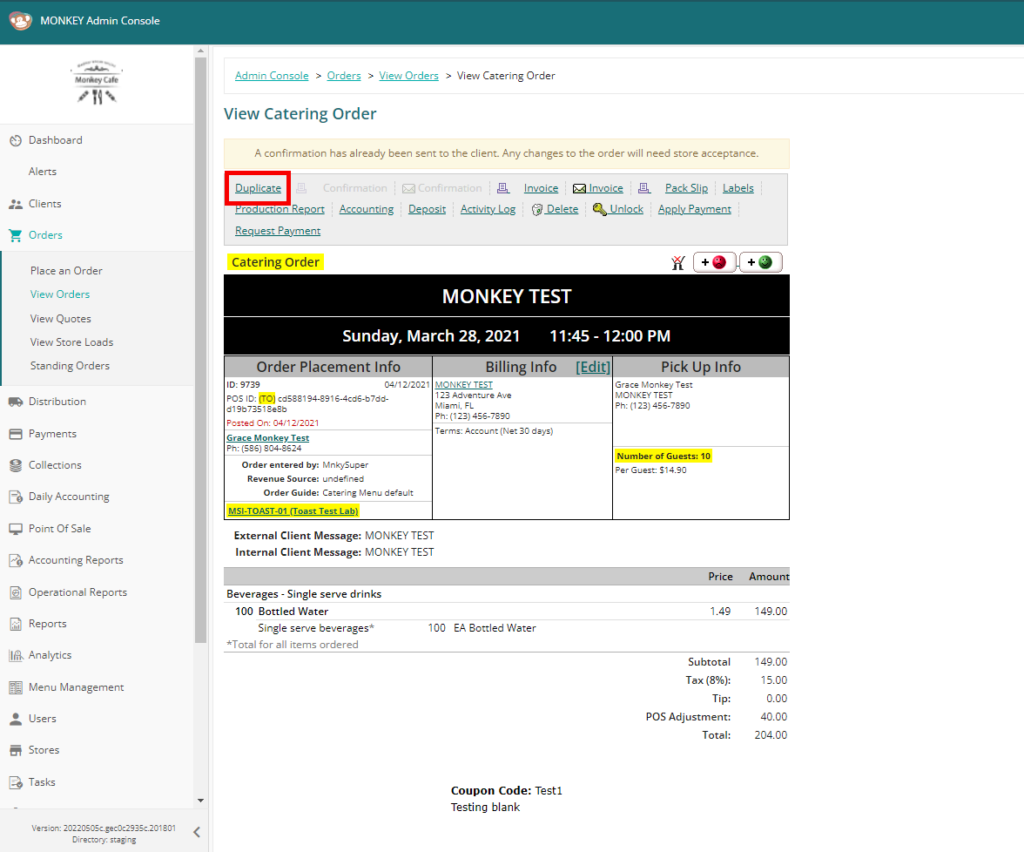
- Click Duplicate to start a new order using the same fulfillment details and order contents as the previous order
Review the order history and copy an existing order’s info, menu items, and saved payment methods

Applying a Deposit
Deposits can be applied to cover full or partial payment, and can be returned if the order is cancelled prior to the fulfillment date.
- Use the View Orders page to locate the order, if needed
- Click the Order ID to review and confirm it is the correct order
- Click Deposit
- Select the deposit method, date it is being taken, and the amount to be deposited
- Click Go
Deposits can only be applied prior to the date of fulfillment. When the date locks, deposits are converted to payment by deposit.
Returning a Deposit
Deposits can be returned to the customer if an order has been cancelled prior to the date of fulfillment.
- Use the View Orders page to locate the order, if needed
- Click the Order ID to review and confirm it is the correct order
- Click Deposit
- Click the + next to the deposit you would like to return
- Select the return method, the date of the return, and the amount to the returned, as well as any notes
- Click Go
Deposits can only be returned prior to being converted as payment, after which point the payment must be refunded.
Daily Accounting
Applying a Refund to an Order
Refunding an order will return funds to the card without resetting the balance to the order.
- Use the View Orders page to locate the order to be refunded
- Click the Order ID to review and confirm it is the correct order
- Click Refund
- Select Credit Card, and enter the subtotal/tax to be refunded and reason the refund is being made
- Click Go
All refunds are final and can not be undone. Funds will be returned to the client within 24 hours.
Making a Chargeback
After a refund, a chargeback can be made to reset the total balance and allow a new payment to be applied.
- Have recently applied a refund to the order and returned to the readback screen
- Click the payment value
- Click Chargeback
- Select the current date and enter a reason the chargeback is being made
- Click Go to reset the entire balance owed for the order
Chargebacks do not return funds to the customer and should only be used after refunding an order, if alternate payment is being recorded.
If a chargeback was made by accident, click the trash can to delete it.
Applying a Manual Payment
Manually apply payment in the event of an error with automatic collection, or if a collected payment needs to be corrected.
- Use the View Orders page to locate the order to be paid
- Click the Order ID to review and confirm it is the correct order
- Click Apply Payment
- Select the payment type, and enter the subtotal and tax to be collected
- Click Go
Manually apply a Payment type to collect/record payment, or a Sales Correction to record forfeited payment.
Payments can only be collected on or after the date of fulfillment.
Requesting a Credit Card/Payment
Requests can be made to preauthorize payment in advance of order fulfillment, or to immediately secure payment after it has been fulfilled.
- Locate the order and enter the readback screen
- Click Request Payment
- Confirm the recipient’s email address and click Send to deliver the request
- Ask the customer to open the email and enter their details using the secure form
Request credit card details from the customer using a secure email form.
Requests for payment details expire after 60 minutes, or after initiated 5 times.
Accounting Reports
Payment Gateway Reconciliation
Get up to date reporting on gateway interactions.
- Navigate to Payments > Payment Gateway Reconciliation
- Specify the date range you want to report on, and group your card types as desired
- Click Search to produce the report
- Reports can be exported by selecting the corresponding option.
Use the in-app report to check the history of transactions moving through the payment gateway to your bank account.
Enhanced Reports
Use the admin console to get up to date reporting on locked or unlocked sales figured in-app.
- Navigate to Reports and select a report
- Use the filters to limit results by date, store, status, etc., and group your data by specific data types
- Click View Report to produce the report
- Reports can be printed or exported by selecting the corresponding option.
Make sure to accept all your orders as they arrive in the system to prevent locking issues and keep your sales reports up to date.
Use the admin console’s enhanced reports to check your sales and transaction numbers, including accounting dates that are yet to be locked.
Managing your Menu
Review your Menu Online
- Review your menu by navigating the online ordering site
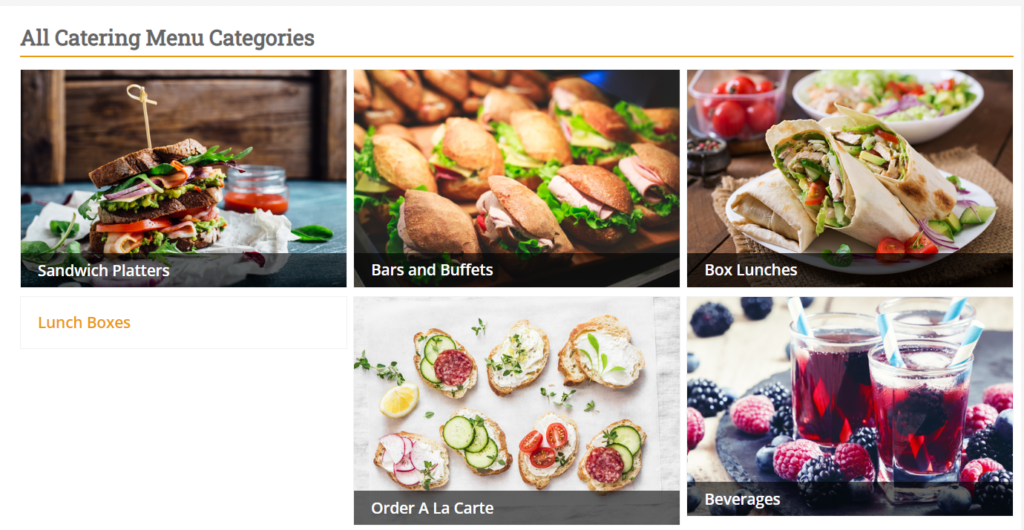
- Use the left navigation panel to view menu categories
- Add items to the cart to view available selections
- All menu availability is handled at the corporate level
- Change requests can be submitted through Catering Support
Review the available menu options online
Review the current catering offerings directly on your online Catering page here.

In-App Help Documents
Still have questions? Search our in app help by clicking the ‘?’ in the top right corner for expanded text articles on how to use the app
Access our Video Modules
Need more training? Review video training modules directly from the app by clicking the ‘?’ and searching the keyword ‘Module’.
Contact the Support Team
Need help? Please submit a ticket through Catering Support.